Showing posts with label nursery necessities. Show all posts

Sunday, April 18, 2010

So Happy for You!

Hey there stampers! Hope you are having a great day!

Today's card is one I made while planning my Brides and Babies class but it didn't make the cut.  It's missing something-not sure what :0)


STEPS:


  1. Start with a Whisper White card base and add a panel of Sending Love Specialty DSP.
  2. Add a strip of Regal Rose on top of a larger strip of Pretty in Pink.
  3. Stamp the butterflies from the Flight of the Butterfly stamp set in Pretty in Pink and Regal Rose and punch with the Butterfly punch and scissors.  Adhere to card.
  4. Stamp the sentiment from the Nursery Necessities stamp set in Basic Black and punch with the Word Window Punch.  Add to Regal Rose punched with the Modern Label Punch and adhere to card.

INGREDIENTS:


  • STAMPS: Nursery Necessities, Flight of the Butterfly
  • INK: Regal Rose, Pretty in Pink
  • PAPER: Pretty in Pink, Regal Rose, Sending Love Specialty DSP
  • ACCESSORIES: Dimensional
  • TOOLS: Butterfly Punch

Thanks for stopping by!
Hugs,

Friday, April 16, 2010

It's a Girl!

Hey there stampers! Thanks for checking in with me today!  I am so glad you did!

Today's card is the last from the Brides and Babies class.  A baby girl card in the shape of a bib!  So cute isn't it?  Again this is one I have seen on multiple occasions on multiple sites so I cannot tell you who came up with this idea first but i am so glad they did!


STEPS:


  1. Die cut Pretty in Pink card stock using the Big Shot and the Scallop Circle Die placing the card stock just inside the edge of the die so that approximately 5 scallops are omitted so your card will still have a fold.
  2. Cut a semi circle out of the "neck" (our punches will not punch through 2 layers of card stock-our paper is thick!) Using the Crop-A-Dile punch 2 holes and insert 2 Jumbo Eyelets and set.
  3. Insert Melon Mambo Polka Dot Ribbon through the Jumbo Eyelets and knot.  Add a bow using Pink Gingham Ribbon.
  4. Stamp the bird from the Nursery Necessities stamp set in Melon Mambo ink on Whisper White and punch with the 1" Circle Punch.  Add to Pretty in Pink punched with the 1 3/8" Circle Punch and finally onto Whisper White punched with the Scallop Circle Punch.  Adhere to card.
  5. Using the Melon Mambo Stampin' Write Marker add little dots to the scallops of the card and Scallop Circle.
  6. Step details

INGREDIENTS:


  • STAMPS: Nursery Necessities
  • INK: Melon Mambo
  • PAPER: Pretty in Pink, Whisper White
  • ACCESSORIES: Melon Mambo Polka Dot Ribbon, Pink Gingham Ribbon, Jumbo Eyelets
  • TOOLS: 1" Circle Punch, 1 3/8" Circle Punch, Big Shot, Scallop Circle Die, Crop-A-Dile, Scallop Circle Punch

Hope you enjoyed my card today!
Hugs,

Thursday, April 15, 2010

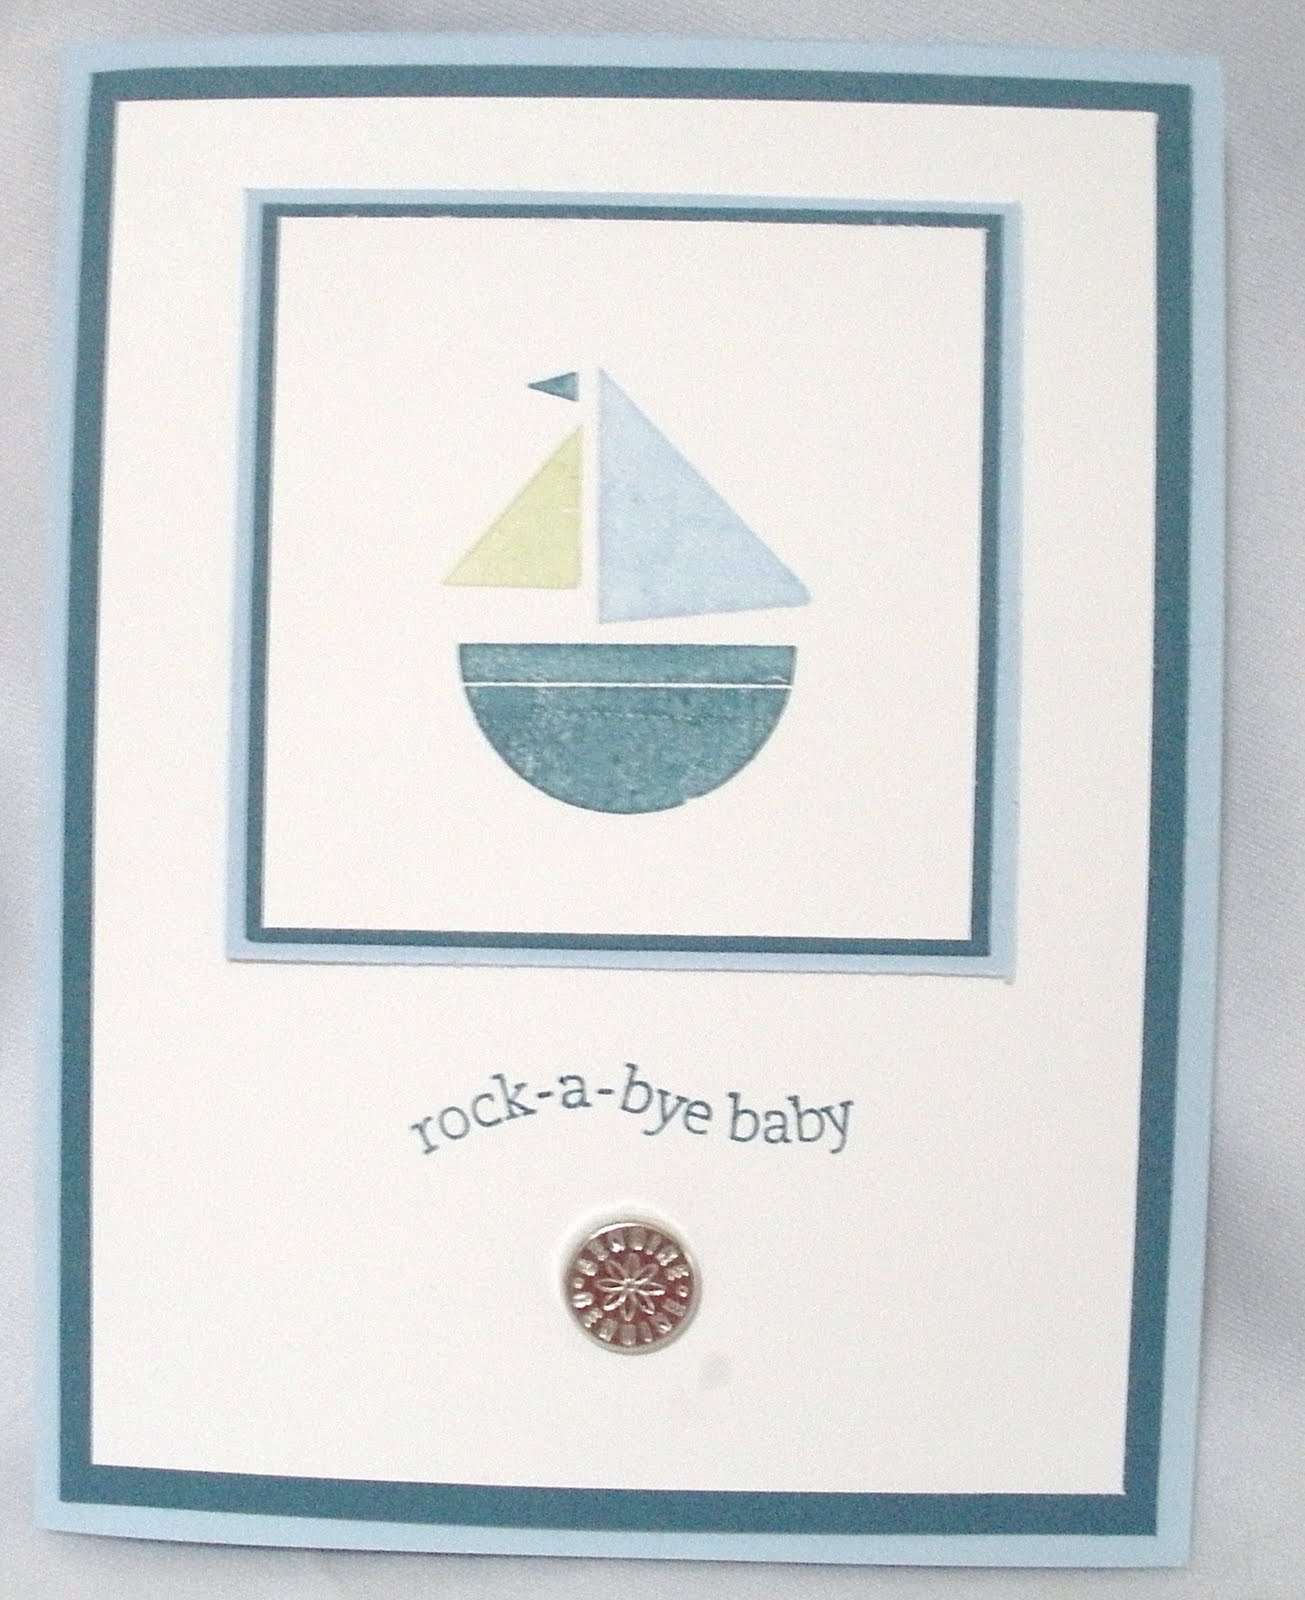
Rock-A-Bye-Baby

Hey there stampers! Thanks for stopping by today!

Today's card is yet another from my Brides and Babies class last Saturday.  We had such fun making these!


STEPS:


  1. Start with a Bashful Blue card base and add a panel of Not Quite Navy.
  2. Stamp the sentiment from the Nursery Necessities stamp set in Not Quite Navy on Whisper White.
  3. Using the 1/16" Circle Punch punch a hole and insert Genuine Brad.  Adhere to card.
  4. Stamp the sailboat from the Nursery necessities stamp set using Not Quite Navy, Certainly Celery and Bashful Blue Stampin' Write Markers on Whisper White.  Mat onto Not Quite Navy and then Bashful Blue.  Adhere to card.
INGREDIENTS:


  • STAMPS: Nursery Necessities
  • INK: Not Quite Navy, Certainly Celery and Bashful Blue Stampin' Write Markers
  • PAPER: Not Quite Navy, Bashful Blue, Whisper White
  • ACCESSORIES: Genuine Brad
  • TOOLS: 1/16" Circle Punch

Have a great day and I hope to see you back again soon!
Hugs,

Thursday, August 20, 2009

A Little Note of Thanks

Hey there stampers! Happy to "see" you here today!
Today's card is a thank you for baby shower gifts that I made with one of my customers today. It turned out super cute!


Inside


STEPS:

  1. Cut Chocolate Chip card stock at 5 1/2" x 8 1/2" fold in half. Cut Whisper White using the Top Note SU Die. For inside panel cut Bashful Blue at 5 1/4" x 4" and Whisper White at 3 1/2" x 5".
  2. Stamp moon and stars images fromt he Nursery Necessities stamp set in Barely Banana on your top note piece. Using Stampin' Write Markers stamp the boat on the top note piece.
  3. Stamp the sentiment from the Little Note of Thanks Mini Note Kit (retired) in Chocolate Chip Ink using the Stamp-a-ma-jig.
  4. Adhere ribbon around card and add top note piece over it.
  5. Stamp the elephant image from the Nursery Necessities stamp set in Bashful Blue on the 3 1/2" x 5" panel of Whisper White, mat it on the Bashful Blue piece and adhere it to the inside of the card.

INGREDIENTS:

  • STAMPS: A Little Note of Thanks Mini Note Kit (retired), Nursery Necessities (#113506)
  • INK: Bashful Blue, Chocolate Chip, Barely Banana, Stampin' Write Markers
  • PAPER: Bashful Blue, Chocolate Chip, Whisper White
  • ACCESSORIES: ribbon, Top Note Die


So what do you think?
Hugs,

Friday, August 14, 2009

Sweet Centers!

Hey there stampers! Thanks for joining me today! Boy do I have something fun to show you today!! A sneak peek at a product available starting September 1st, called Sweet Treat Cups. You'll find them in the new Holiday Mini along with so much more!

Today's card is one I made to give my sister and brother in law to congratulate them on the birth of their son, Sebastian.


STEPS:

  1. Cut your Bashful Blue card stock at 5 1/2" x 8 1/2" and fold in half for your card base. add a panel of Ballet Blue cut at 4" x 5 1/2".
  2. Next cut Whisper White card stock at 3 3/4" x 4", create a mask using the Scallop Circle Punch and make the clouds using a Sponge and some Bashful Blue Ink in a circular motion around your scallop circle mask.
  3. Stamp the hot air balloon image from the NEW Sweet Centers stamp set in Creamy Caramel on your cloudy main piece and again in Bashful Blue on Bashful Blue card stock. Trim the Bashful Blue scallop edge of the balloon basket and adhere over the top of the Creamy Caramel one.
  4. Punch out a Bashful Blue circle using the 1 3/4" Circle Punch and a strip of Bashful Blue card stock cut at 1" x 3 3/4" with the Scallop Edge Punch. Adhere Scallop Edge to bottom of cloudy piece.
  5. Fill Sweet Treat Cup with whatever you'd like-I added little baby bottles, pacifiers and glitter. Peel off the adhesive backing and cover with your 1 3/4" Bashful Blue circle and add to your card where the balloon would go.
  6. Stamp your sentiment from the Nursery Necessities stamp set in Basic Black on Whisper White, punch with the Word Window Punch, add to Bashful Blue punched with the Modern Label Punch and adhere to your card.Last stamp bunny image from the Forest Friends stamp set in Going Gray, color and cut out. Adhere with Dimensionals.
INGREDIENTS:

  • STAMPS: Nursery Necessities (#113506), Forest Friends (#113748), Sweet Centers (#116521)
  • INK: Bashful Blue, Going Gray, Basic Black, Creamy Caramel
  • PAPER: Bashful Blue, Ballet Blue, Whisper White
  • ACCESSORIES: Scallop Edge Punch, Scallop Circle Punch, Dimensionals, Sweet Treat Cups (#116802 available 9/1)pacifiers and bottles

Hugs,

Thursday, May 28, 2009

Color Challenge and a Sketch!

Good Morning Stampers! Happy Thursday!


Today's card combines two challenges again. :) I used Kristina Werner's Color Challenge and the Diva Coffee Break ladies came up with another great sketch!


I started out my card with my typical WW base, added a panel of Pacific Point stamped with the large star from the Nursery Necessities stamp set in White Craft Ink, and added my strip of Real Red stamped with one of the sentiments in the same set in Basic Black. I added the Silver Brads and stamped my moon and little stars in Summer Sun. I punched out my little stars with the Small Star Punch and hand cut the moon. I added my images using Snail and Dimensionals. Very simple, as almost all my cards are, but definitely packs a punch with the bright colors!

Hope you liked my card and to see you again tomorrow!

Hugs,
Elizabeth

Thursday, May 14, 2009

Opus Gluei in Reach Challenge

Good morning Stampers! Happy Thursday! Thanks so much for stopping by today!

Today's card is one I made after reading the new challenge at a new blog I found recently called the Order of the Opus Gluei-silly name but super fun! These ladies know how to get their craft on! :)

The challenge is to create something using just what is within reach of your work space and nothing else. I actually learned about the challenge on Monday morning, but I had cleared EVERYTHING off of my work space (insert shocked face here!)before leaving on Friday for my fabulous camping weekend. So I couldn't play until I had created something else and the mess that always goes with my creative process.

I had a made a card for Karen's Sweet Sunday Sketch and used the Nursery Necessities set to create a baby card for yesterday's post. So the materials I had out I used for today's challenge. I have two family members having baby boys in July so another baby card worked out terrific!


I started out with a Bashful Blue card base, stamped the stars from the Nursery Necessities set randomly in bashful Blue and added a leftover strip of Delicate Dots DSP from the Sale-A-Bration special. I stamped the little chicks in So Saffron and punched them with my 1" Circle Punch and matted them on Certainly Celery punched with my 1 1/4" Circle Punch. The elephant is stamped in Bashful Blue, cut out and layered on a 1 3/8" Square of So Saffron. The final touch is the sentiment stamped in Basic Black. Cute!

Ingredients:
Stamps: Nursery Necessities Paper: Bashful Blue, So Saffron, Certainly Celery, Delicate Dots DSP Ink: Bashful Blue, So Saffron, Basic Black Accessories: 1" and 1 1/4" Circle Punches, 1 3/8" Square Punch

Need a challenge? Try this one!
Have a super day!
Hugs,
Elizabeth